We all need secondary or additional drives on our computer to manage the data easily. For example, we can divide our hard disk into 4 partitions: C-Drive for Windows, D-drive for Media, E-drive for Software and F-drive for keeping all Documents.
There are a number of ways, by which you can easily manage the partitions on your hard-disk.
One of such tool is provided free with the Windows 7 – Windows 7 Disk Management System:
1. Go to Windows Search Box, type Disk Management and you’ll see an option by the name Create and Format hard disk partitions, click on it.
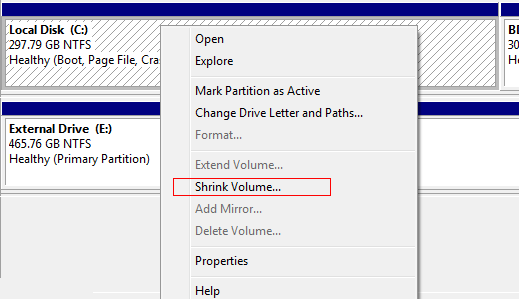
2. Now perform a right click onto the primary partition (e.g. C-Drive) and hit the Shrink Volume option. 
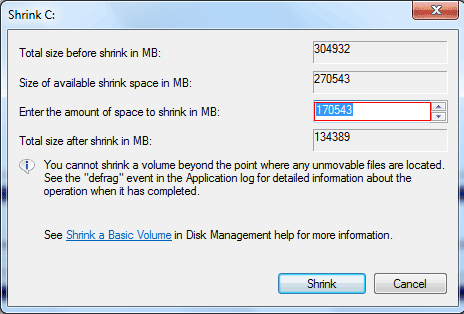
3. After a few moments, a screen will prompt to enter size to shrink the C-drive (Depending upon the size of your C-drive). Just enter the required size, and click the Shrink button. 
4. Now do the right click on that newly created partition, and hit the New Simple Volume option. This option will take you to a wizard, after completing which, your new partition gets ready to use. 